

On July 16, 2024, I entered Indonesia at Soekarno-Hatta International Airport in Jakarta via air from Johor Bahru, Malaysia. This article provides the latest information on the Indonesian entry procedures I personally experienced, explaining them step-by-step. This includes: Visa on Arrival, immigration clearance, and customs declaration.
Obtaining a Visa on Arrival and Immigration Clearance
Visa on Arrival
After disembarking the plane, follow the same direction as other passengers heading for immigration procedures. After a short walk, you’ll see a sign like the image on the right; turn right there.
You will see the Visa on Arrival counter. Line up and submit your passport. The officer will instruct you to enter your email address on a tablet. Only the email address is required.

After paying 500,000 Indonesian Rupiah for the 30-day visa (I had exchanged Indonesian Rupiah in Malaysia, so I paid in Rupiah. They accept credit cards, but there is a fee), you will receive a receipt. Your passport will be returned without any visa stickers attached. (Later, I received a visa acceptance email with a PDF of the visa image attached.) When I entered last July, a visa sticker was affixed, so it seems this has changed within the past year.
Immigration Clearance is Now Automated
Immigration clearance has been automated and digitized. An officer will direct you to an available machine. You just need to scan the personal information page of your passport on the machine, and if an “OK” sign appears, you’re done. There was no entry stamp either.
Customs Declaration is Digitalized: Mandatory Declaration of Mobile Phones and Laptops
I passed through the previous steps surprisingly easily, but at the next customs declaration, I encountered an unexpected situation. An officer was standing in front of a large QR code sign and asked something like, “Have you completed it?” When I said no, they instructed me to scan the code and complete the procedure on the spot. Many other foreigners were also inputting information on their smartphones. I hadn’t checked the latest information since I had just entered last year.
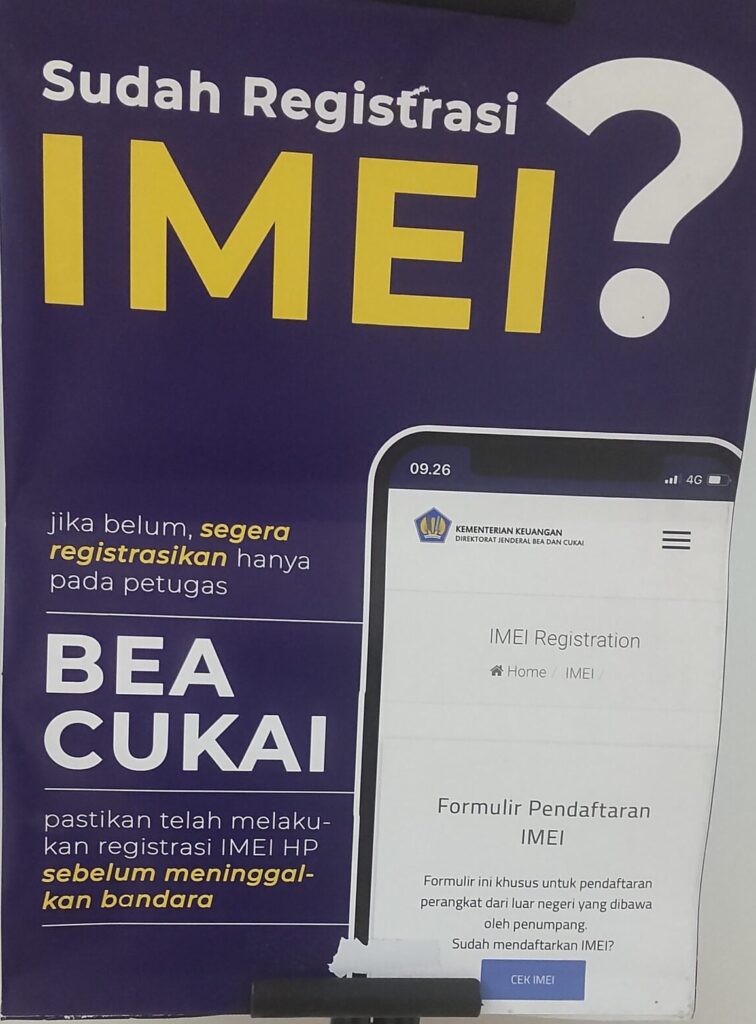
Scanning the QR code takes you to an input screen. You fill in personal information and other details according to the form, but what’s noteworthy is the section for declaring mobile phones and other electronic devices. This means that if you plan to use a mobile phone or other device brought from a foreign country for more than 90 days, you must register the device information and pay taxes, otherwise it will become unusable. (By the way, IMEI is the device’s identification number. You can find it under “Device Information” in your settings.)
This doesn’t apply to short-term travelers staying less than 90 days, but it can be surprising when this item suddenly appears. Just select “NO,” and you’ll be fine. After completing all inputs and submitting, a QR code will be displayed. Scan it with the reading machine, and if you hear an “OK” sound, you’re done.
This electronic declaration can be completed starting two days before entry. Since it’s not available in Japanese, it’s a good idea to complete it in advance if you anticipate difficulty with input. Please refer to the information from the Embassy of Japan in Indonesia below regarding the customs declaration form and input.
Conclusion
Because I had entered last year, I was negligent in assuming there would be no changes, and I ended up taking extra time with the entry procedures. Changes can occur even within just one year, so always make sure to check the latest information once your travel plans are confirmed.